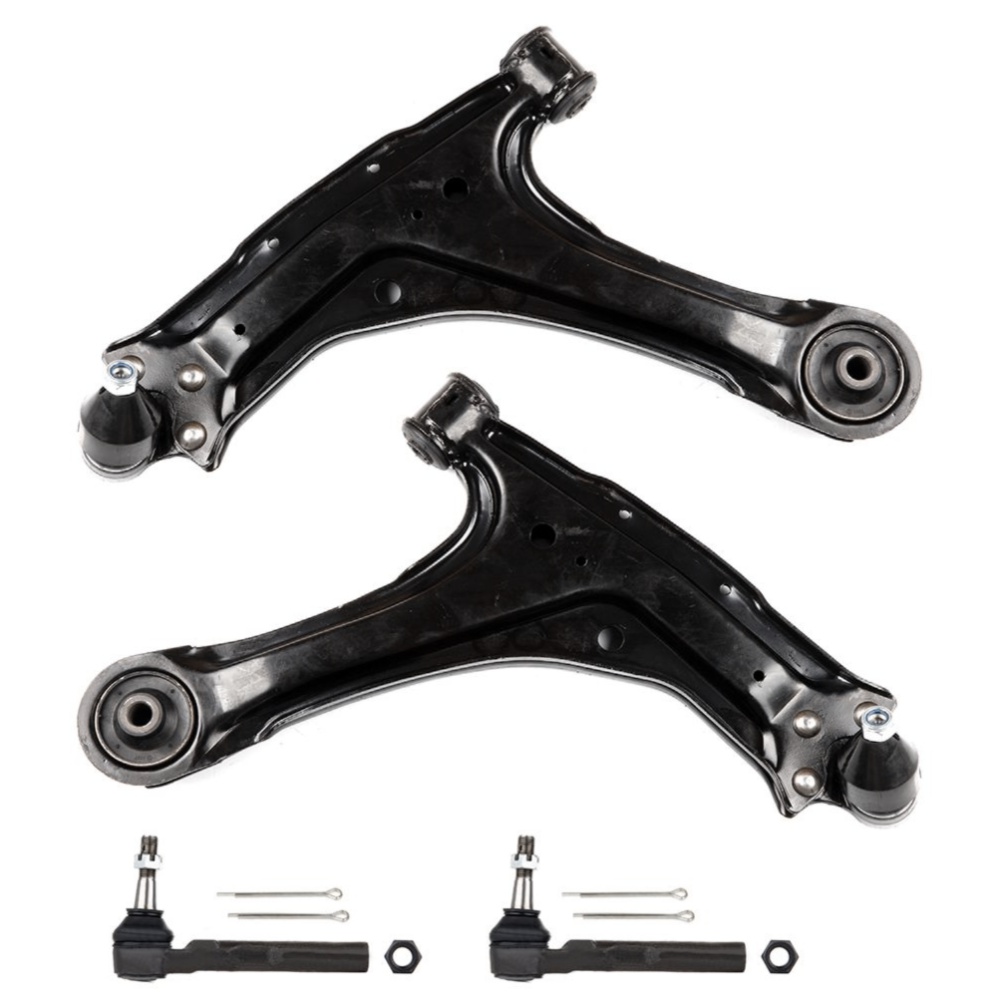
Fitting the Following vehicle:
2004-2005 Chevrolet Classic
1997-2003 Chevrolet Malibu
1999-2004 Oldsmobile Alero
1997-1999 Oldsmobile Cutlass
1999-2005 Pontiac Grand Am
Package Includes:
1x Front Lower Control Arm And Ball Joint - Passenger Side -K804281x Front Lower Control Arm And Ball Joint - Driver Side -K804462x Front Outer Tie Rod End -ES3455
Note
(2). Although some parts have grease fittings, other parts are factory sealed, but do not affect the fit and quality of the parts
10 Year Warranty
This item is backed by our 10-year warranty. In the event this item should fail due to manufacturing defects during intended use, we will replace the part free of charge. This warranty covers the cost of the part only
Suspension Control Arm Replacement Guideline:
Control arms are installed in pairs on the front and rear axle and connect the chassis to the wheels as part of the suspension. Therefore, they have a significant influence on the driving characteristics of the vehicle
A dynamic or a comfortable driving style? The control arms are individually adjusted to the vehicle depending on the desired characteristics. They also absorb lateral movements and forces resulting from driving off and braking
A defective control arm can manifest in the following ways:
(1).Noise (squeaking, creaking, rumbling)
(2).Deteriorating driveability
(3).Increasingly woolly and imprecise steering
(4).Uneven tyre wear
Tip:If the control arm is in working order, it is possible to only replace the defective bearings and joints. However, replacing bearings, control arm bushings and ball joints can be very complex and costly
1.First lift the vehicle using a car lift, ideally a wheel-free four-post car lift. This makes it easier to correctly tighten the control arm fixing screws
WARNING:Depending on the axle design, the control arm may need to be secured against falling with a suitable device, e.g. a transmission lifter
2.Treat the fixing screws and nuts of the control arm with rust solvent and leave it to work for a few minutes so that they are easier to loosen
3.On vehicles with automatic headlight levelling, it may be necessary to detach the leveling sensor from the control arm
4.If the stabilizer is connected to the control arm, the next step is to loosen and remove the corresponding stabiliser fixing screws
5.Loosen and remove the control arm fixing screws
6.Loosen the ball joint at the steering knuckle with a suitable special tool (e.g. a puller)
7.Remove the old control arm
8.Clean the mounting flange of the ball joint pin on the steering knuckle with sandpaper and then with brake cleaner. Otherwise single rust particles can enter the new control arm joint via the ball pin, potentially leading to premature failure of the joint
9.Fit the new control arm with the supplied accessories and attach new fixing screws and nuts
10.Reattach the stabilizer and, if applicable, the leveling sensor for headlight leveling to the control arm
NOTE:Do not tighten the fixing screws and nuts in this step, otherwise the rubber mounts will twist when the suspension compresses. This would lead to undesired preloading onf the mounts
12.Tighten the fixing screws with the torque stipulated by the vehicle manufacturer
13.Lower the vehicle all the way
14.Measure the chassis and adjust if necessary
15.Check and, if necessary, adjust the headlight settings on vehicles with automatic headlight leveling where the leveling sensor is attached to the control arm
16.To conclude, test-drive the vehicle
Frequently Asked Questions
(1).What\'s the function of control arm?
The control arm connects the hub and the frame of the car. There are ball joints on the hub side and bushings on the frame side to achieve up and down instead of forward and rearward
(2).What is the significance of the control arm for the car?
(3).How to tell the quality of control arm?
Look at the materials and processing of the control arm: the materials used to control the arm, common are steel and aluminum alloy. In ordinary family cars, steel control arms are very common, and the basic appeal is to meet the strength while controlling costs. In the middle and high-end models, you will see the control arm of the aluminum alloy and the wheel bearing housing. In addition to meeting the strength of the suspension, this material can further reduce the weight and reduce the weight of the suspension spring to improve the suspension response. Improve driving performance.
(4).Do I need to replace the control arm if the bushings are worn? What is the safety risk?
(5).What is the average cost of replacing control arms?
The cost to replace control arms depend on the vehicle. Control arms cost different amounts depending on the vehicle, as well as the labor to install. Some are easy to install and take little time, while others can take several hours
Tie-Rod End Replacement Guideline:
This useful tip applies to the exchange of tie rod ends and inner tie rods, which together form the so-called tie rod
Note: Cleanliness is extremely important when working on the power steering. Incorrect work and contamination can lead to leakage and, in the worst case, to failure of the steering assistance
1.Lift the vehicle and dismount the front axle wheels
2.Spray the fastening nut of the tie rod end with rust remover and leave it on for a few minutes
3.Dismount the front underride guard
4.Loosen the fastening nut from the tie rod and remove it completely
5.Remove the tie rod end from the steering knuckle using an appropriate ball joint separator
6.Remove the clamp of the bellow on the steering gear
7.Push the bellow towards the tie rod end
8.Unscrew the inner tie rod from the rack
9.Clean the sealing face of the bellow at the steering gear
10.Clean the lug of the rubber contact surface of the ball joint in the steering knuckle
Note:Always use new self-locking nuts and bolts for a reliable repair
11.Screw the new inner tie rod into the rack and tighten it with the tightening torque that has been specified by the vehicle manufacturer
12.Mount the bellow and close the clamps with the appropriate special tool
Note:Incorrect mounting of the bellow can lead to corrosion of the rack: the steering gear starts leaking which can lead to a failure in the steering assistance
13.Secure the ball joint in the steering knuckle and mount the nut. Please observe the tightening torque suggested by the vehicle manufacturer
Note:During mounting, the ball stud should not turn within the ball joint. This can cause damage inside the ball joint and can lead to early failure
Tip:Secure the ball stud against twisting with a suitable tool
14.Mount the front underride guard
15.Mount the front wheels and tighten them with the tightening torque recommended by the vehicle manufacturer
16.Align the wheels and adjust them if necessary. Observe the vehicle manufacturer specifications
17.Perform a test drive
(1).What are the symptoms of a bad sway bar?
(2).What happens when a sway bar breaks?